
If only our little ones would stay little. I don’t know about you, but I would love to freeze time right now. I don’t want my son to grow up into a pre-teen quite yet. I’m sure you feel the same way, so lets slow down and treasure this time we have with our children.
We can be more intentional about having face to face, undistracted time with them during these years. They want to spend time with us in these spaces.
Today, I would like to share with you where we are now in our ever changing playroom. This playroom reorganization project has special sentimental value to me since it will probably be my last “little kid” playroom until my son is a pre-teen. Because of that, I wanted to capture more of that innocence and childlike imagination.
Yes, the Playroom Will Change (Again)
I often have wishful thinking, and I imagine how this room could just stay the same for my son’s entire life. This is just not real life. Our children grow and change constantly, and with that our playrooms change and grow constantly. Toys move in and out as their interests change. I know that in a few years, our playroom will change yet again into a room for a pre-teen. For now, I am going to enjoy this season.
BEFORE PICS
As you can see, we did have somewhat of an organization system already. We had clear plastic bins that were mostly labeled, rolling carts which were also labeled, and then a place to display Legos. All you see though are these organizers when you walk into the room, and it can feel overwhelming.
Our Goals:
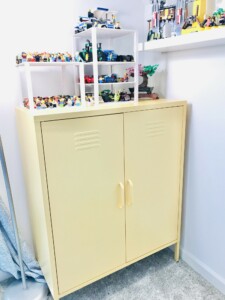
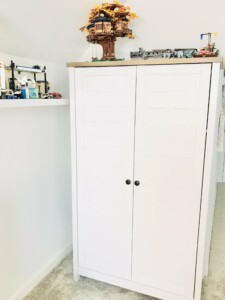
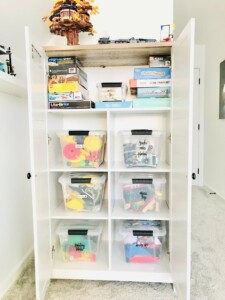
- We want to put our toys in organizers BEHIND closed cabinet doors.
- We want to add some fun color to the room.
- We would like to make our playroom more of a Lego building area now that we are getting older and spend more of our play time inside building with Legos or with our engineering Eureka Crates. We want lots more open space to build.
- We would like to donate what we are no longer playing with at this point.
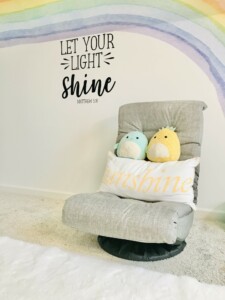
- I want my son to see faith filled sayings around him and be inspired to stay curious, imaginative, innovative, and kind.
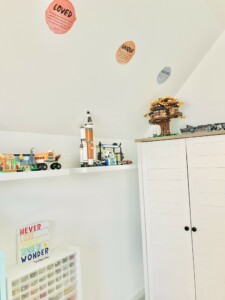
AFTER PICS
So the playroom is done! Phew! I am glad I did this because now my son has so much more space to play!
Why This Works Better
- We donated toys we no longer were playing with so that we could free up space.
- We have closed cabinets now! We can hide organizers that were staring at us every time we came into this room. Closed cabinets are the way to go even with organizers behind them. I wish I did this sooner!
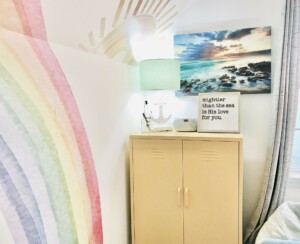
- We have color and a personalized theme now. My son’s name means “bright light” and “bright personality/bright intelligence”, so this theme fell into place for who he is.
- We love building with Legos, so we chose to focus on displaying those while putting everything else behind closed cabinets.
- Faith-filled saying are important to our family, so going across our room are sayings we want our son to remember and hold on to as he is forming his identity. These wall decals are also posted in my shop at the bottom of the page if you are interested in trying any of them for your playroom. They were easy to put up, and I think everything will be easy to take down when we change it out later on.
- Yes, this playroom will change probably again in three short years. However, I am going to enjoy it while it lasts! The nice thing about this is that everything will just come off the wall since it is all sticky wall decals. I will be able to peel off the sticky wall decals, replace it with something else, and still use the cabinets either in this room or another room of our home.


Are you interested in redoing your playroom? If so, here are the steps we followed to help us along the way.
Steps I Followed
- Take everything (I mean everything) out of the room. As you do this, make a donate pile. This may be overwhelming and tearful at times, but if you can get through this hard part, you won’t regret it later on!
- After you have your donations ready, take them into your car. Make a pile in another room of everything else. Tired? Take a break and close the door. Keep your child’s bedroom nice and neat. Put an “under construction” sign up on the door. Allow your kids to have toys to play with while they wait for their room to be done. Again, this may be overwhelming and tearful at times waiting, but it is worth it.
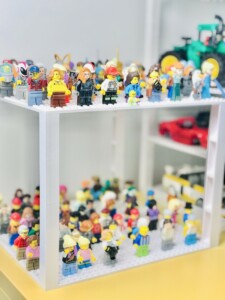
- My son then went through each bin he already had and put his mini toys into the mini toy organizer below I got him. He LOVED this! He was so happy to finally have a home for his mini toys that were getting lost in the bins and larger organizers.
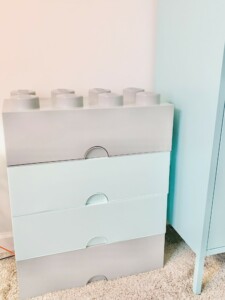
- Put all of your Legos (we had them color coded in organizers) into 4-5 large LEGO organizers instead. This is where we are now with our Legos, and it is working better for us in this phase of learning.
- Throw out toys that are broken. Make each organized clear plastic bin more intentional. If you don’t have labels for them, you can use the labels below or make your own.
- Start putting together those new furniture pieces now. My husband put together the 4 new furniture pieces for me (thank you!) while I started putting up the wall decals.
- Slowly, start adding the organizers back into the room, but now put them behind those closed cabinets! Have a few empty clear bins as well behind those closed doors, so there is space to grow into as well.
- Reorganize those Legos that have been created on floating shelves and high up on cabinets. Broken Legos that your child wants to still build can go into organizers in one of those closed cabinets, so they can get them out at a future time. I used baseplates (see below) which helped to stack Legos up higher. We had fun putting the Lego people on the baseplates!
- I really do like the new white and colorful metal organizers I found on Amazon. They are sturdy, and I think we definitely saved money going this route. I could have done built-ins, but decided to save money and make it easier.
Have fun reorganizing your playroom, and don’t give up when the process gets overwhelming. Stay focused on the end goal, and your child won’t want to leave their playroom when it completed!
Cheers!
His playroom looks fantastic!👍 He will enjoy this bright, clean, inspiring, & relaxing place to create & build his LEGOS, & play with his other toys!
This is absolutely beautiful!