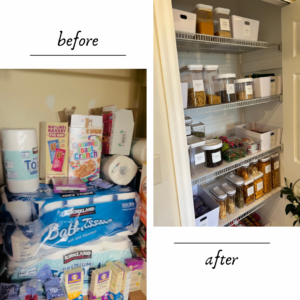
Hello friends! Are you ready to learn more about how to do a pantry cleanout and improve your kitchen organization? At Getting Creative With Carolyn, we completed a pantry cleanout and organization for family. It is possible to have an organization system in place that works for your family, and you can do it in just a few days if you work hard and stay focused!
Here are some tips.
Clear Out Absolutely Everything
Remember these six words: it is going to be messy. You are going to want to quit and not finish. Request the help of friends or family because you really need to clear out everything in your cabinets and pantry. I mean-everything. I want to be honest with you, so you know what to expect going into it. Your pantry cleanout may take you the longest to complete depending on how long it’s been since you have cleaned out your pantry. You may end up finding things you stuffed in there when you moved into your home. You will also find open bags with no clips, and it will get messy. Don’t underestimate the amount of trash bags you will use. You may end up using 10 trash bags filled with boxes and expired food. Please note that boxes take up a lot of space even when they are broken down. Be ready with lots of trash bags for this step.
Pay attention to all dates on food products. You can give some away to a local food pantry if needed as well. I recommend using your hand held vacuum in the cabinets since things will get messy here. Expect food to fall on the ground and some sticky mess in your cabinets. You will be doing a good amount of cleaning in this step. Have someone on garbage duty to help you with this step. Doing this cleanout will show you how much food waste your family is accumulating and help you see the value in not wasting your food. You will see how shoving your food into your cabinets is just continuing the cycle of not knowing what you have. We all get busy and do it, so don’t feel bad. This is why you need to set up an organization system that will be easy for you. You will start to realize that it is important to see what you have, so it doesn’t get lost in your cabinets anymore.
It is so easy to shove food into your cabinets until we forget what we got in the first place. Have you ever opened one of your cabinets and thought, “Oh, I forgot I bought that” or “That’s where it went”? This happens to all of us when we don’t have a system for organization.
Be Practical
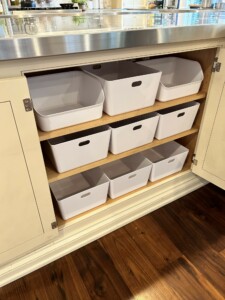
When thinking about what organizers you want to use, think realistically about your family. If you will have small children for the next two or more years, I would definitely use plastic organizers. If your children are getting older and they can handle glass, then maybe go with glass. Remember, you can add organizers as the years go on. Put glass up higher if you don’t want your kids to get to it. The goal right now is to just get started. Once you have your organization system in place, you can add more stylish organizers to it as the years go on.
We chose to use organizers from Target for this kitchen cleanout since they were plastic, more affordable, and easier to use for small hands. We wanted to ensure that the entire family, including the kids, could get involved in baking or getting their own snacks without any worries of glass breaking.
Request Help
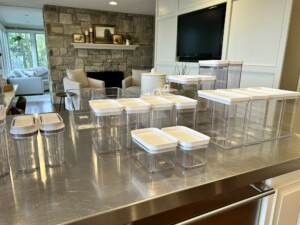
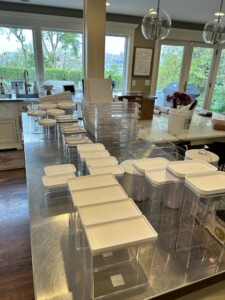
You will want to request help from someone who can take all of the organizers out of their boxes. Even pulling off all of those stickers on each organizer will take time. Have them line them up by size, so you can see what you have to use. Someone on garbage duty and organizer duty will help you tremendously through this cleanout process. I requested the help from my son and husband for these two tasks. With the support of friends or family, you can get this done!
Get More Organizers Than You Think You Need
I underestimated the amount of organizers I would need. I thought I got more than enough just to find myself running back to the store two more times. I didn’t realize how many I would need since I went in spurts for my organizers in my own home. Because I was doing it all at once, I definitely needed more than I realized. This did add up due to the current costs of inflation. If you don’t have any organizers, you will be starting from scratch. Please note that this will be a larger investment in organizers to get your pantry organized. I do believe though that it is worth the money you will spend since once you have your organizers, you won’t have to go back and get many more as time goes on. You should have what you need in the long run, and your organization system will be in its place. Just think how your food items will stay fresher, and you will have less food waste. Everything will have a home, and this will bring more calm to your home. I think it is definitely worth the investment.
So how did I set up everything?
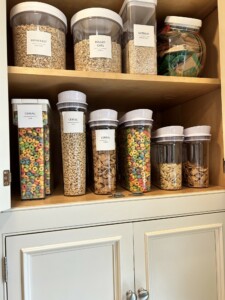
Set Up a Breakfast Zone
Put your oatmeal, granola, and cereal in one location that is easy to get to in the morning. Be sure to have extra shelving above it for future cereal boxes, so that you don’t overflow this area again.
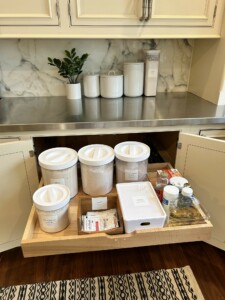
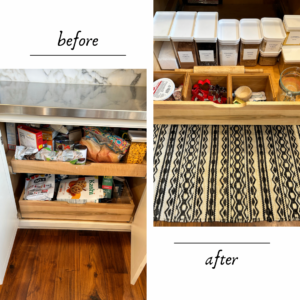
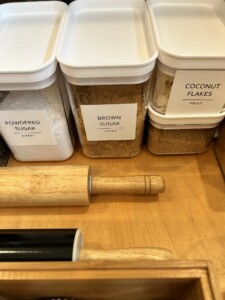
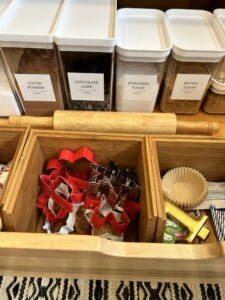
Set up a Baking Zone
I put all of the baking items together in 2 roll out drawers beside each other. I placed the measuring cups, rolling pins, sprinkles, and other baking items in these drawers as well. Everything that is needed for baking should be in their own baking zone. This way, you aren’t trying to figure out where you put the cocoa powder or chocolate chips in your pantry. I like to put them low so the kids can easily get involved in the baking fun!
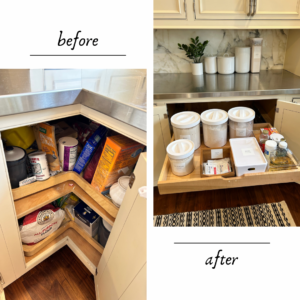
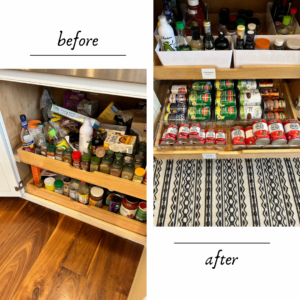
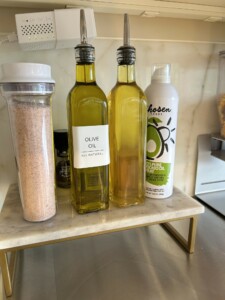
Set Up a Condiment/Seasoning Zone and a Canned Product Zone
Keeping all of the condiments and seasonings together in their own drawer will be helpful when cooking in the kitchen. I put this across from the oven, so it would be easier to get to when cooking. Due to the weight of canned products, I recommend putting those on a lower cabinet or the ground in their own groupings.
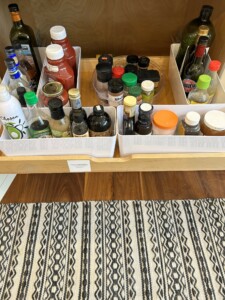
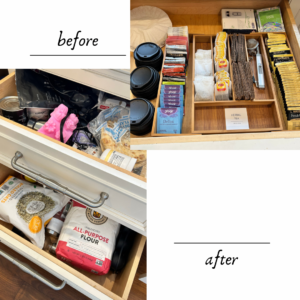
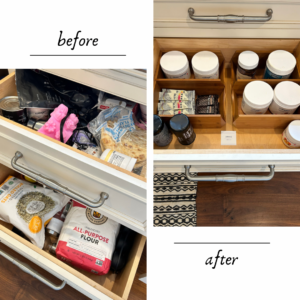
Set Up a Drink/Coffee Zone
All of the tea or coffee products and drink supplements should be in the same space. Put this by the coffee maker and the sink to make it easier when making drinks. I used bamboo for these organizers.
Don’t Forget Your Spices
If you are able to have a vertical roll out spice cabinet installed in your kitchen by your oven, I would definitely have one installed. If you are unable to do this, you can buy one to mount on the side wall of your pantry. We did this temporarily until we got our vertical roll out spice cabinet in our new home. In our own home, I purchased glass spice containers and labels and filled mine. If you already have matching spices with green lids like the picture below, you won’t need to do this.

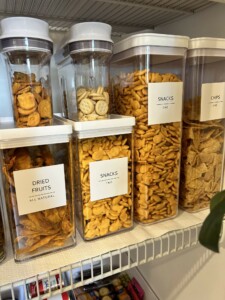
Set Up a Snack Zone
I like to put the snacks together on the bottom 2-3 shelves so that it is easier to get to by kids. We want our children to learn independence, so place these snacks within arms reach so they can easily get into it after school. Watch out for those candy items though. You may want to move those to a different location.
Leave some of these organizers empty since they will fill up more in time. Also, use varying heights if needed. You can place a basket in the back upside down to simply elevate the items in the back. You want to make sure you can see your snacks, or you will end up buying more without using what you have.
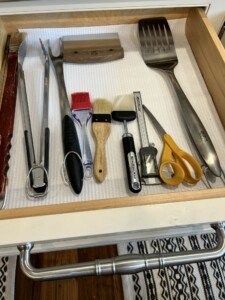
Create a Grill Zone
I like to put grill tools together so it is easy to get to during those barbecues and cookouts with family.
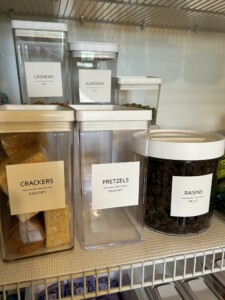
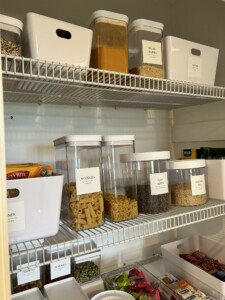
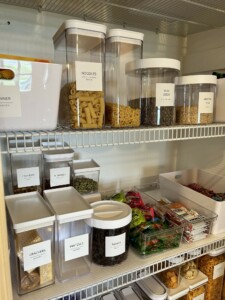
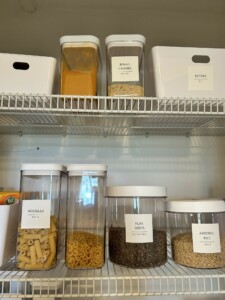
Create a Pasta and Rice Zone
Put all of your pasta and rice items together in your pantry. It makes it easier to get to when you are ready to cook. I like to put this together on one shelf.
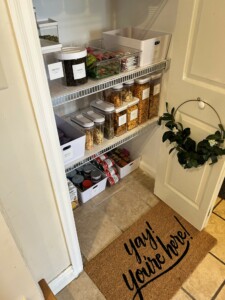
Work With What You Have to Start Your Pantry
Most closets can be turned into a pantry with extra shelving and paint. You can set one up temporarily like the one below then in the future, you can add in wood shelving, wallpaper, and extended shelving into another space. I would recommend that you work with what you have for now to get started then in the future you can go back and add in those special touches when you are ready to invest in a larger pantry area. Do what you can with your current budget.
If you are ready to financially splurge on organizers, wooden shelving, wallpaper, and a large extra pantry space in another area of your home with shelf lighting then get that project written up. Remember though that you have to live and eat in your home, so if you do decide to do it all at once, it may make it challenging to eat in your kitchen while the project is going on. If you do it in these steps, it may make it more manageable for your family. You can always go back and add in a larger pantry space after your food is organized and your organization system is completed.
Set Up an Overflow Area
Is there a spot in your kitchen that is just being used for storage? Perhaps, you can move that into a plastic bin, label it, and place it in your basement by your seasonal decor. This area could be used for your overflow area. You will get to the point where you will need more space. If you don’t have a larger pantry space in your home, set up an overflow area for now. Once you see what you need to store, you can change out the height of the shelving or the organizers. For now, try to get this overflow space started.
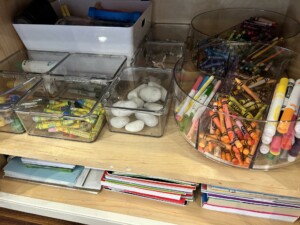
Add in an Easy Craft Area
You may already have a craft area or a place in your playroom for those crayons and markers. However, sometimes, it is nice to have craft supplies ready to use in the kitchen for those rainy days when you are cooking and the kids are wanting to spend time with you in the kitchen. If you have an extra cabinet, I would recommend that you fill it with an easy craft area for the kids.
Thanks for following along! Like what you see? Subscribe to my blog to receive updates about my latest articles.
Grateful you are here,
Carolyn