At Getting Creative With Carolyn, we are letting love into the messiest parts of our home. Today, I want to talk about something you may be wanting to set up in your home—a dedicated cleaning closet.
I’ll be honest. I don’t get excited for cleaning the house. I’d rather organize than clean any day! For me, I prefer to pay a cleaning company to come in and clean the house! Right? You may feel the same way. It’s easy to just throw our cleaning supplies under our kitchen sink or bathroom sinks until they pile up, and you forget where you put the Windex and the Magic Erasers.
This was me until I decided to turn one of my closets near my pantry into a dedicated cleaning closet. It was time. It was a mess under my kitchen sink and bathroom sinks even a few weeks after cleaning it because there was just not enough space. It was just not working anymore.
Here is what I did to set up my own dedicated cleaning closet in just four easy steps.
1. Choose a Closet

I chose to use our second coat closet near the pantry and mudroom for our dedicated cleaning closet. Some people don’t want to give this one up, but I am able to store our winter jackets in our basement then rotate the jackets when it’s time for warmer weather. Our closet is just a small one, but it works! Choose one that you are able to get into easily. There is not enough room here to put a pretty barn door on it, but that is okay!
2. Purchase Organizers and Labels

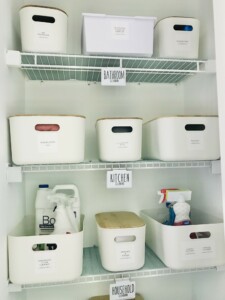
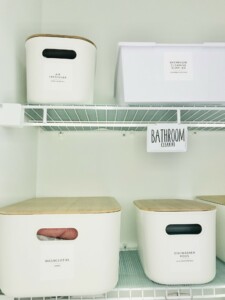
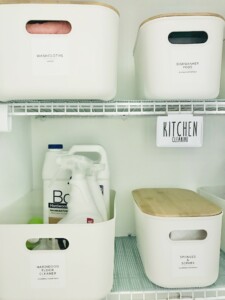
Choose organizers and labels that fit your style and space. I liked the ones with closed bamboo lids. You can check out the organizers and labels I used in my cleaning closet below.
3. Add in Extra Shelving
Our home had hardly any shelving in the closets, so we bought extra shelving, cut it to the correct length, and added extra shelving to this cleaning closet at a very low cost. It’s really frustrating how home builders put up houses so quickly, neglecting the shelving in the closets.
4. Use a Different Labeled Category for Each Shelf

At first, I was just sitting on the kitchen floor surrounded by cleaning supplies trying to figure out where to put what. As I was looking at our cleaning supplies, I realized I could just make each shelf a new category, so I did bathroom cleaning on my top shelf, kitchen cleaning on my second shelf, household cleaning on my third shelf, and then trash bags on my lower shelf with room to grow. Below that, I organized my ziplac baggies in a pull out drawer. I like how I have room to add more as time goes on as well. You can also put 2-3 empty carrying cubbies on the bottom of your cleaning closet so when it’s time to clean, it will be easy to pick up and go. This may also be a good space to hang a cleaning chore chart. On cleaning day, get the whole family involved! My son was obsessed with the vacuum and his Melissa and Doug cleaning toys when he was younger.
I hope you find these steps helpful and inspiring as you set up a dedicated cleaning closet in your home! If you are still overwhelmed by cleaning, delegate more of the work to your family. Hopefully, cleaning will go more smoothly for you and your family as the months go on.
